Introduction
Overview
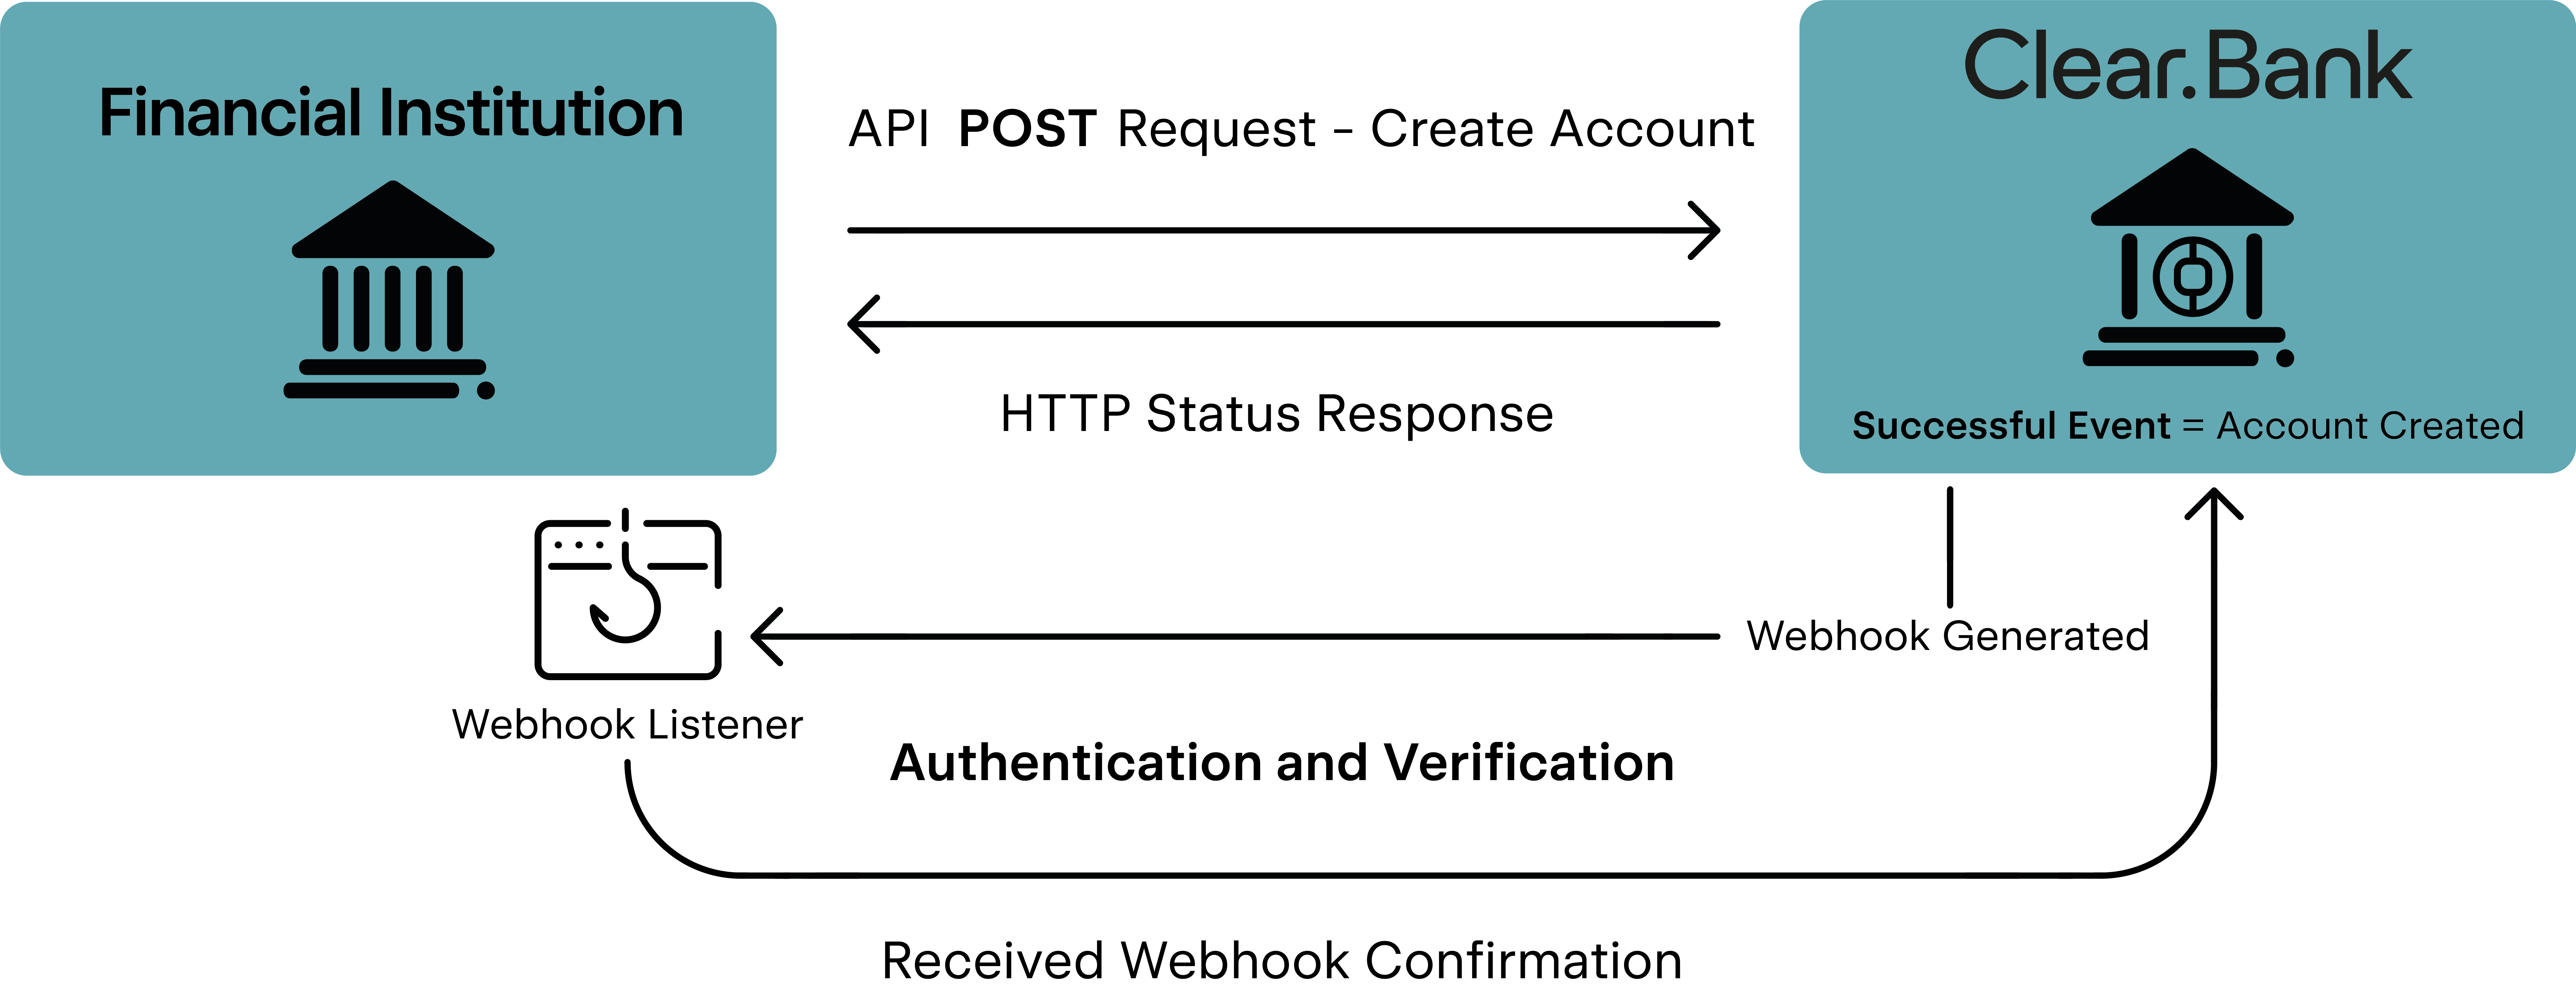
The ClearBank® API is a JSON RESTful API which allows you to seamlessly integrate your system with our Banking as a Service (BaaS) platform. Our API enables you to open and manage accounts and process transactions in near real-time. We use webhooks to deliver transaction confirmation notifications and account-specific reconciliations to your system as soon as such events occur on your account.
The ClearBank® API is available for consumption by financial institutions, Financial Conduct Authority (FCA) regulated businesses and fintech companies which have been onboarded with ClearBank®.
If you’re any of the above and would like to connect with ClearBank®'s API, please click here to apply.

What you need to get started
Your integration journey with the ClearBank® API includes the following steps:
- You test your connectivity and interaction with our full suite of endpoints and webhooks in a simulation environment (sandbox environment)
- We take you through a QA process to confirm successful integration
- Finally, you will be promoted to use the API in a live/production environment
Accessing the Simulation Environment
You will need the following to connect to the API in a simulation environment:
- Web address for the Institution portal: https://institution-sim.clearbank.co.uk/
- Login credentials for the Institution portal (these are provided to you during the onboarding process)
- Your authentication profile
Accessing the Production Environment
You will need the following to connect to the API in a production environment:
- Web address for the Institution portal: https://institution.clearbank.co.uk/
- Login credentials for the Institution portal (these are provided to you during the onboarding process)
- The ClearBank® authenticator app registered with your Android, iOS or Windows device (this can be downloaded from Google Play, the App Store or the Microsoft Store)
- Your authentication profile
Creating your authentication profile
Your ClearBank® authentication profile links your institution to your public key. Therefore, it must be valid.
Your authentication profile is a combination of:
- A Key Pair (public/private)
- A Certificate Signing Request (CSR) in PKCS #10 format*
- A token
*In the simulation environment, a CSR can be generated using Open Source solutions. In the production environment, a CSR must be generated using a FIPS 140-2 level 2 compliant Hardware Security Module (HSM) such as Azure KV HSM, Amazon CloudHSM, GoogleCloudHSM (this is not an exhaustive list).
Follow these steps to create a valid authentication profile
- Generate your Public Key and Private Key pair in PKCS #8 format*
- Generate your Certificate Signing Request (CSR) in PKCS #10 format which contains your certificate and Public Key
- Save your CSR as a .csr file
- Sign in to the Institution portal
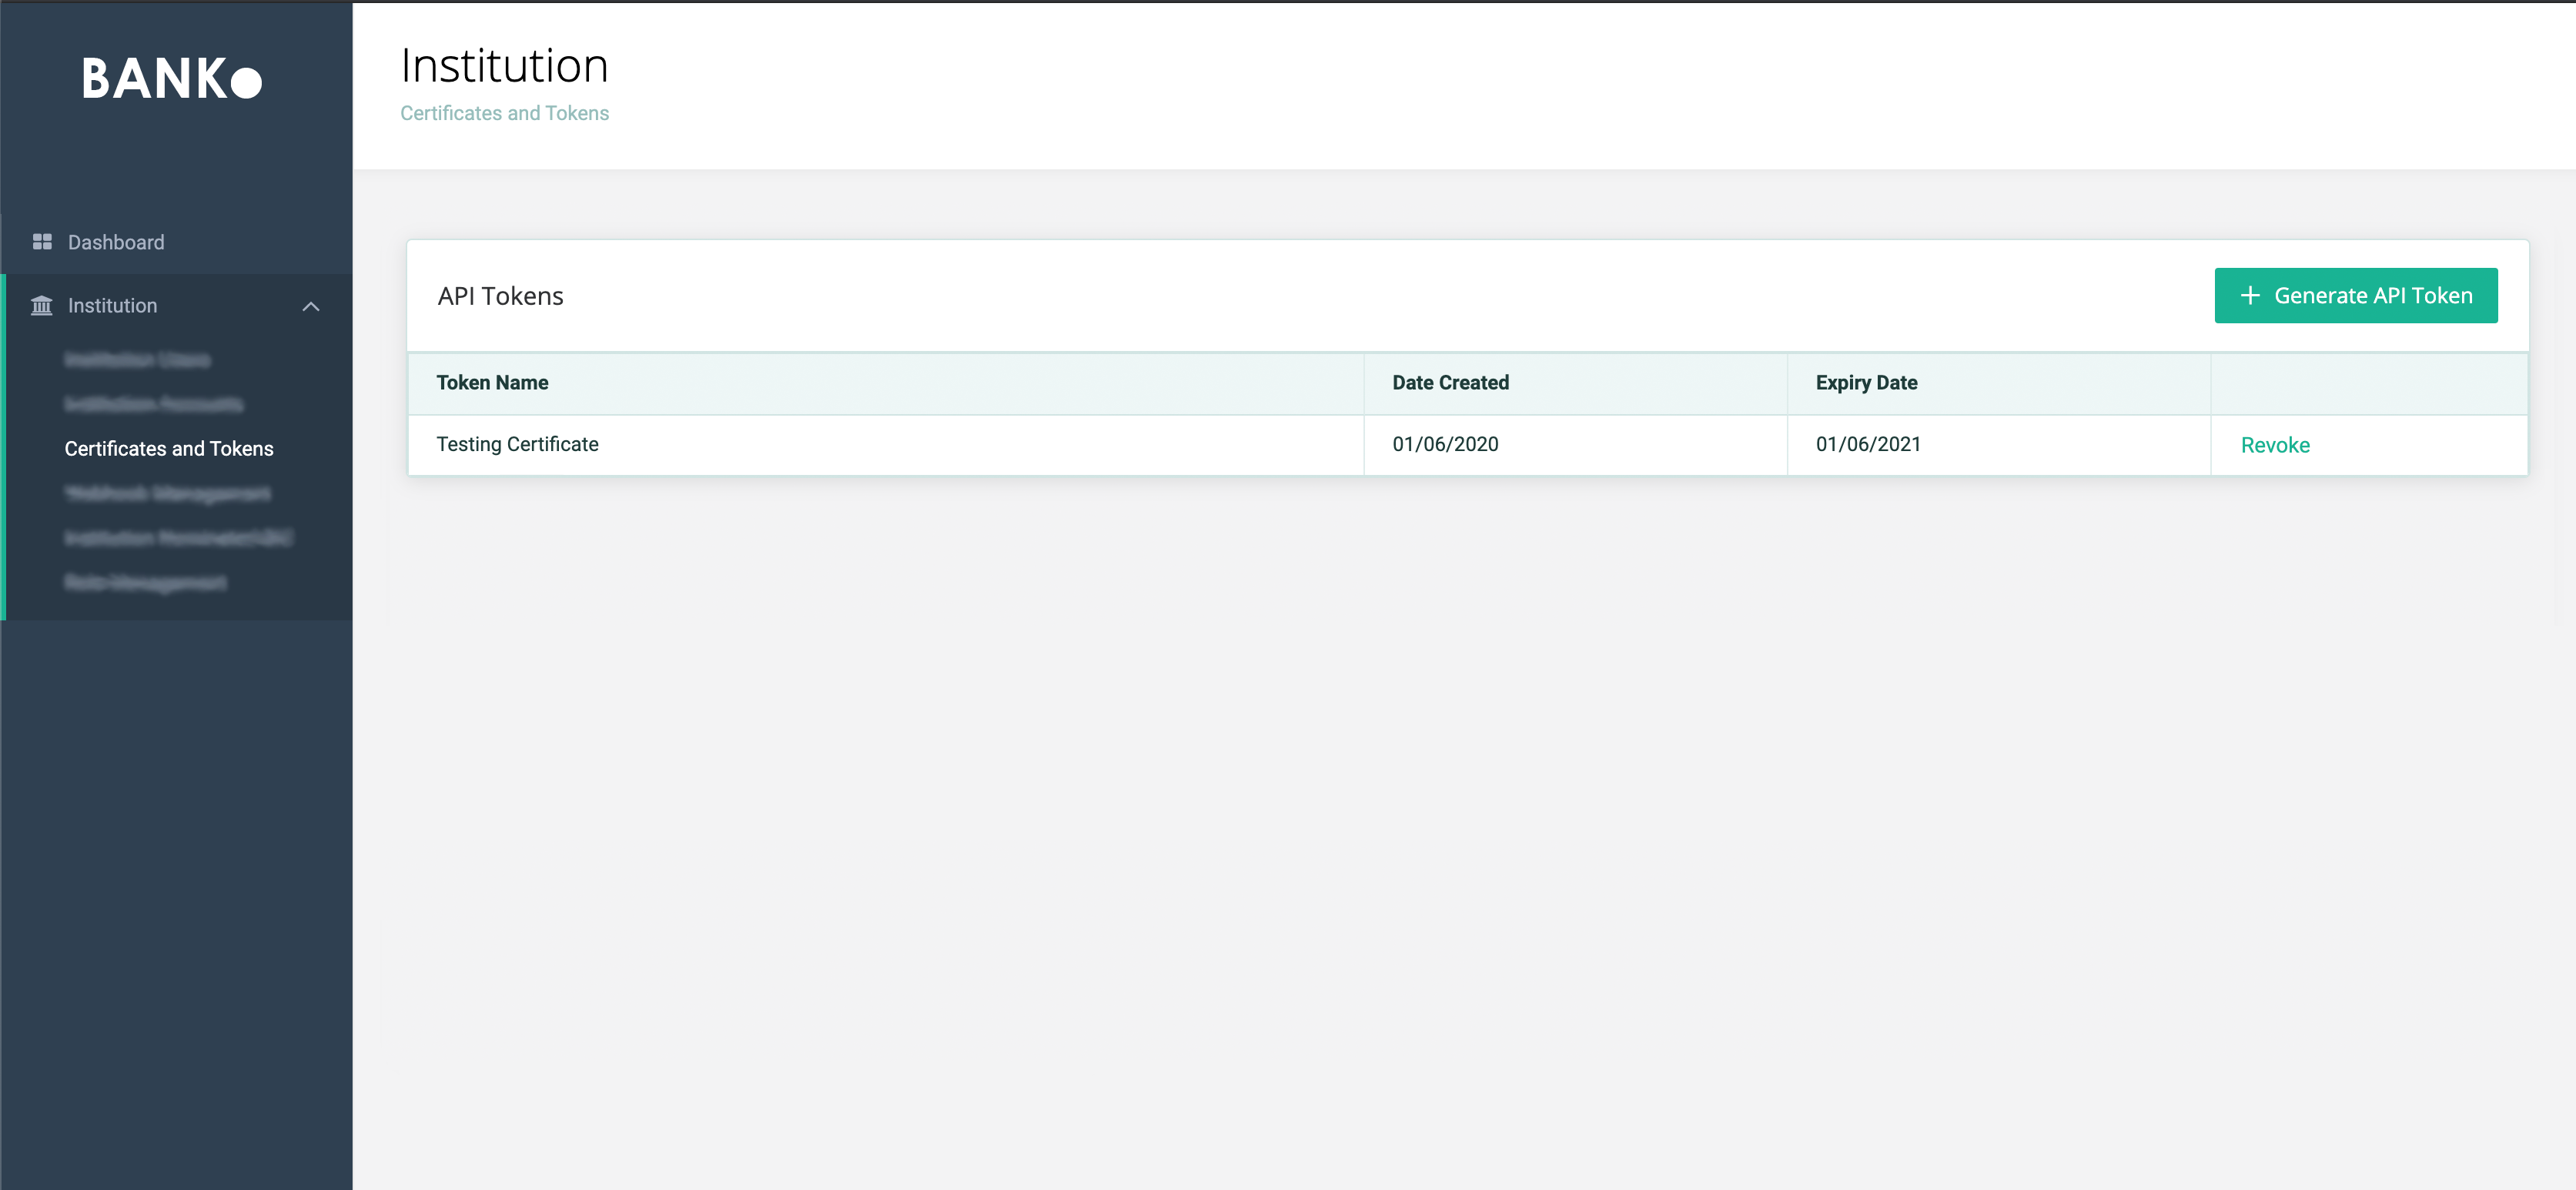
- From the menu, select Institution > Certificates and Tokens
*In the simulation environment, you can utilise Open Source tools to store your Private Key. In the production environment, you must use a physical or virtual HSM solution to store your private key (see HSM requirements above)
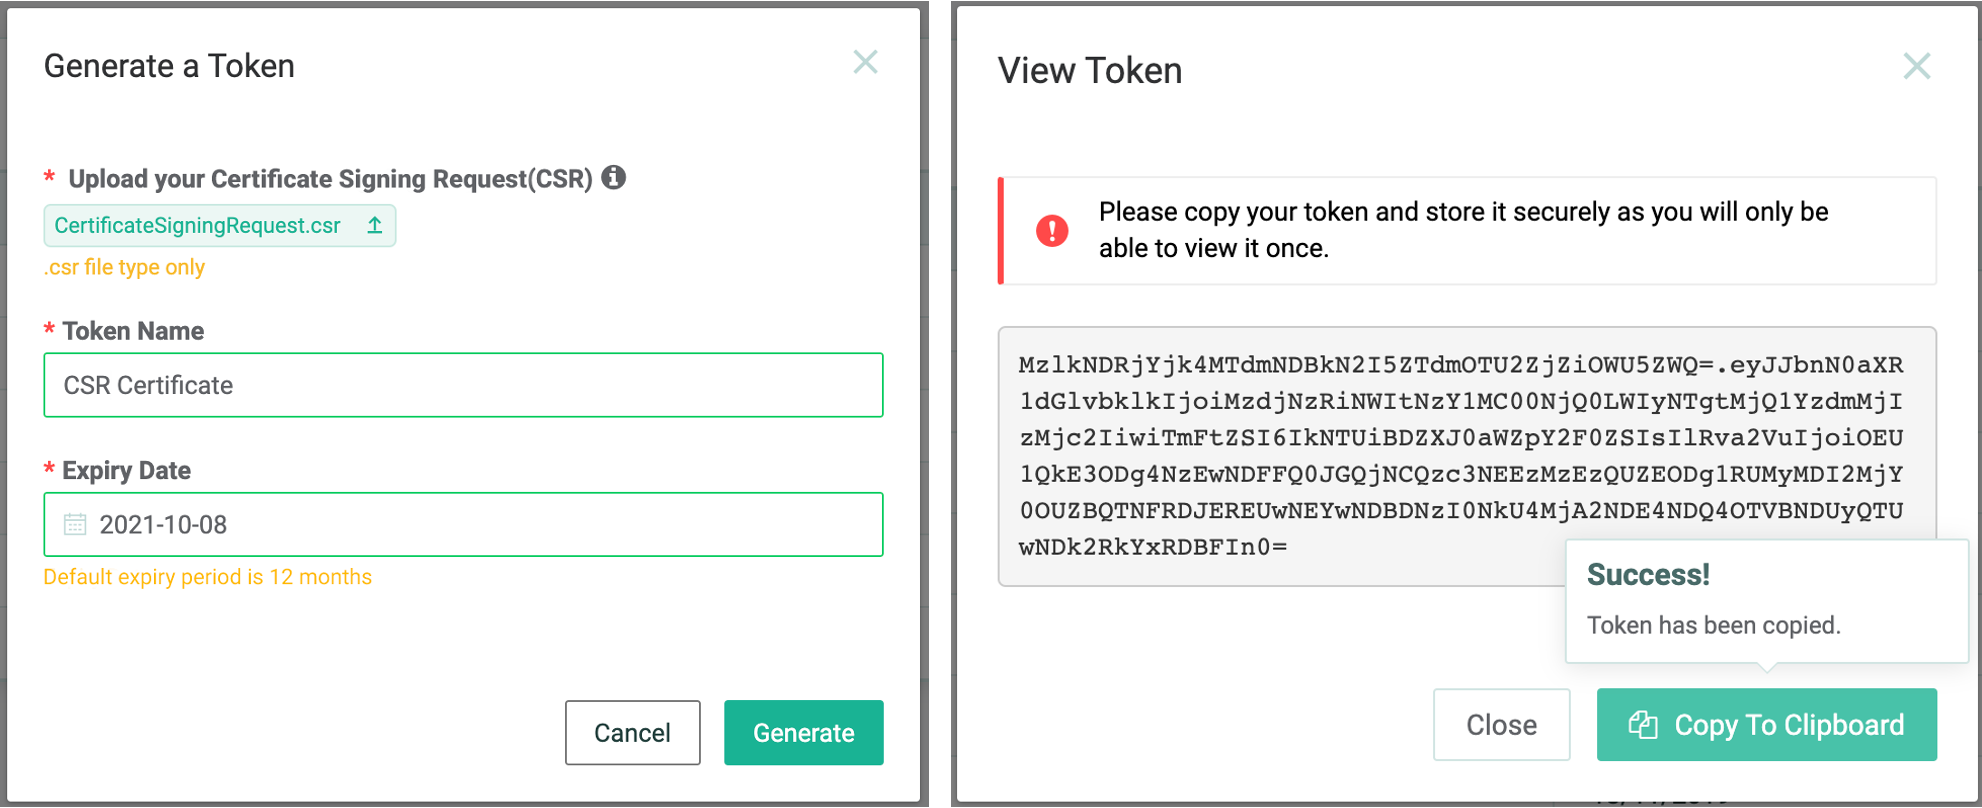
- Click the Generate API Token button

- Upload your Certificate Signing Request (.CSR) file
- Enter the Token Name and select an Expiry Date
- Click the Generate button to generate your token
- Your token will appear in the View Token window

- You will only be able to view your token once (at the time of creation)
- You can copy the token directly or copy it to your clipboard using the button provided
- Ensure that you store your token securely now. Otherwise, you will need to generate a new one

Congratulations! You have successfully created your authentication profile.
Creating your Digital Signature
We use a Digital Signature to ensure that the integrity of a request body (sent to us) is maintained. The whole HTTP request body (in its original format) is used to create a Digital Signature, as it is specific to the body of each request.
We use the following specifications to create a Digital Signature:
- Raw Message Encoding: UTF-8
- Message digest algorithm: SHA-256
- Signing algorithm: RSA
- Padding: PKCS#1 v1.5
- Digital Signature Encoding: Base64
Follow these steps to create a Digital Signature:
- UTF-8 encode the exact request body that will be sent to our institution api (any differences e.g., addition/removal of spaces will result in a totally different Digital Signature)
- Hash the encoded value using SHA-256
- Request a Digital Signature for that hash value from your Hardware Security Module (HSM)*
- The output is the Message Digital Signature
- Send the Base64 encoded string representation of the digital signature in the HTTP header DigitalSignature for all requests that have a request body
*In the simulation environment, these operations can be undertaken using Open Source solutions.
For additional help with creating your authentication profile and Digital Signature, please refer to the following examples on the ClearBank GitHub repository:
- C# example for ClearBank® API and Webhooks
- Postman Collections for invoking the ClearBank® API
- C# example for signing ClearBank® API requests
- Python example for signing ClearBank® API requests
- Java example for signing ClearBank® API requests
Please note that the code in these examples is not production ready and has been simplified for brevity.